Lived on-board Hadar

Daisypath Vacation tickers

Sunday, September 23, 2007

The Great Engine Strip Down

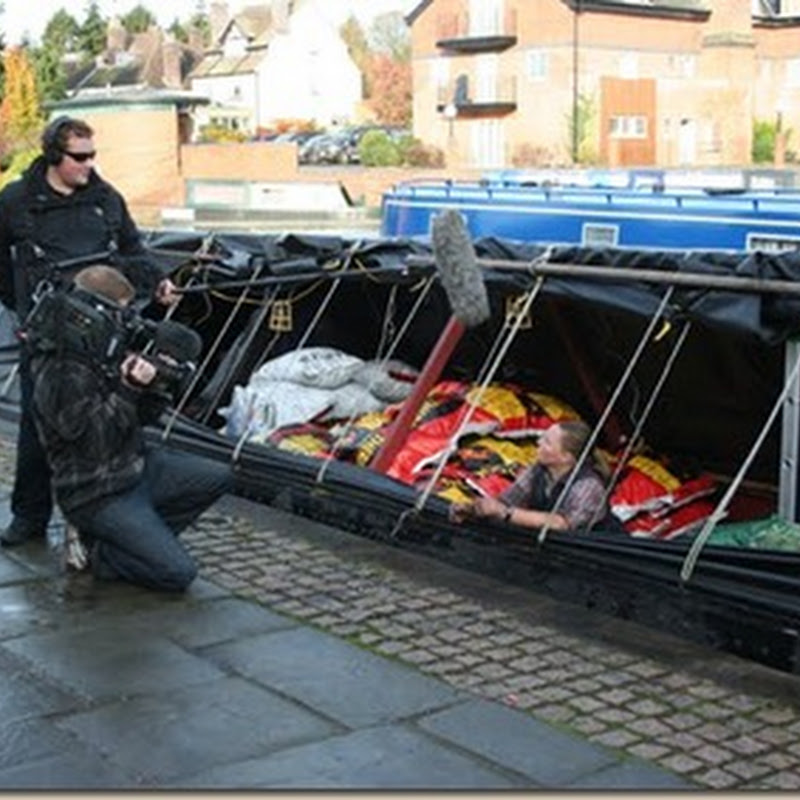
The Head is Removed.

After the head had been removed to get to the head gasket for a template for the new ones, and sent away for skimming and the valves rebedding, Keith and Roger blocked of the cooling system within the block and then filled it with water. This was then left for a few days to see if the wet liners were leaking. A wet liner is a cylinder that fits inside the engine block within which the piston slides up and down. It is wet because it is internally exposed to the water jacket to greatly increase the cooling effect. However it does mean that a water seal has to be present at the bottom of the liner to prevent water from dripping into the oil sump. After a few days the water level had dropped and there were damp patches on the paper towels they had left under the cylinders. Keith took the decision to take the liners out and get them checked, he felt there was no point in only doing half a job on the engine having got this far.
The 2nd Piston and Crank is removed.

It took Roger and Keith a whole day to remove both pistons in preparation to remove the liners. It was a learning curve for both of them as without any form of manual on the engine they had to guess each stage. Fortunately having spent many hours stripping down car engines when Keith used to do rallying in his younger days this came in useful. They took each step slowly checking everything as they went. Although there are access panels on both sides of the engine to the crankshaft area, there is not a lot of room. One of the hardest parts was getting the split pins out of the big-end blots, but enventually they came out, and so did each piston and crank. Initially they undid the big ends and lifted the pistons up to be able to remove the pistons rings. This then gave them more leeway to drop the pistons back down the cylinders and out through the crank casing.
The Home Made Liner Puller in Operation.

The following morning Roger made a liner puller, which worked very well. Pulling the liners out was the bit they were dreading, yet it ended up being the easiest part, hahahahaha.
1st Liner comes Out.

As can be seen the liners could do with a good scrub down. This being the part of the liner exposed to the water jacket.
Inside the Water Jacket.

The exposed water jacket could also do with a good clean out. It took quite a while to get the inside of the water jacket all cleaned out, but it will be worth it as it will allow the water cooling to be far more effective.

Cleaning the Liners.

The liners needed a good clean up to be able to inspect their condition. During this clean up they discovered that where we had expected an 'O' ring at the bottom of the liner to create the water seal, there was none. Instead there appeared to be the remains of silicone sealant! Keith was glad he decided to do this stage, it could have proved disasterous if this rough seal had failed and dumped the coolant into the oil system, especially whilst on a river, or even worse, tidal waters!
They Now Look a Lot Better.

Now doesn't that look better. below his left hand, the one with the watch on, can be seen the groove in which the 'O' ring should sit. Having got everything all cleaned up, Roger then delivered the liners, pistons and cranks to Allards In Stoke-on-Trent, so that work could be carried out on them. At the worst we may have to have the liners bored out and sleeved as they have worn, a lot depends on what they decide to do after measuring everything.
This Lot was Scraped Out from Inside the Water Jacket.

This tidy pile was what was scraped out of the water jacket once they had got the liners out. Keith thinks this engine is going to sigh a huge sigh of relief when they 1st start it up when it is all back together, and if it could speak we are sure it would thank us for allowing the cooling to cool it properly, bit like for us enjoying a cold shower on a hot day! With the pistons and cranks out of the way access to the sump is now easier, and having removed the oil suction unit, they could now get fully inside and clean out all the emulsified oil and other muck. The oil suction unit cleaned up nicely. This unit lies in the bottom of the sump and is at the lower end of the oil pump, it filters out large lumps from the oil before it is sucked up from the sump into the pump. We now just have to wait for the liners, pistons and cranks to be returned and the long awaited gaskets to arrive when they are ready.

The Oil Suction Unit.

Friday, September 21, 2007

The Inside of Hadar.


Boatman's Cabin Stove.

Now that Hadar is nearly completed we thought it time to show some photos of the inside, which hasn't been easy to do since we moved onboard. We are both so pleased with how Hadar has turned out, she is everything we wanted and much, much more. Starting with the boatman's cabin, this has been decorated as near traditional as possible. The stove area is really the focal point especially when the boat is moored on the starboard side and this area can be viewed from the towpath. Many of the items on display Keith has owned for many years, and some we have bought since living on the canals. I am looking forward to cooking on and in the stove, once the weather gets cold enough. Hopefully many a good stew will be cooked on the stove.

Drop down Table and Crumb draw.

Once the stew is cooked after a long day of cruising, we will be able to sit down at our drop down table to eat dinner.
The Bed 'ole and Cupboards.

The cupboards and bed 'ole end of the cabin. Of course Paddy had to get in on the act.

The Bed Seat.

The photos above the bed seat are myself and Keith when we were little. they go very well with the atmosphere of the traditional cabin.

Side Bed.

Facing the stove is the side bed. This was originally a single bed. The knitted squares blanket is one made by Keith's late mother. Paddy's bed can be seen in front of the coal box (the box with the castle painted on it which also acts as a step). The only untraditional items in the cabin can be seen at the top left, the CB and marine VHF radio transmitters.

Shower.

This photo shows the shower which we have used extensively since we moved onboard and it is vast improvement over the one on "Misty Lady". Unfortunately due to the door configuration it isn't possible to get a photo of the toilet end of the cubicle, but trust me it is there along with a basin!

Utility Area.

The utility area opposite the shower/toilet cubicle with the washing machine, tumble drier and fridge freezer. The small white box on the ceiling is one of the two carbon monoxide detectors.
Starboard Side of the Galley.
The galley area is compact but very functional, with plenty of cupboard space. The picture that can be seen above the TV is of Stone, it was given to me by one of our boating friends here in the basin on her birthday. It will constantly remind us of the lovely time we have had living here.

Port Side of the Galley.

The port side of the galley is the "wet" side with the sink and electric kettle. We have added many extras and hanging utensils again to maximise the space.


The Galley from the Saloon.
From the Saloon end.

The view from the saloon has changed dramatically since we have moved onboard and added all our personal touches. The display cabinet on the left houses Keith's model trains from his exhibition layout Holmehurst. My bookshelf can be seen on the right. The laminated flooring just finishes off the cabin nicely. We are gradually filling up the sloping walls of the saloon with photos and pictures. The 2 bed chairs can be converted into either 2 single beds, or joined together to make a double bed. Paddy gets in on the act again. The stool behind him is one that Kieth's grandfather on his mother's side made. It all looks very cosy and we can both guarantee that it is.

The Saloon End.

Sunday, September 16, 2007

Starlight, Starbright.

(Photographs taken by Andrew Denny)

From our previous posting you will have seen that we had a visit from Andrew on Granny Buttons, a wonderful visit it was. The night before we got to meet Andrew took this lovely night time photograph of Hadar from the towpath. If you look closely you can see the Plough in the night sky. It is a superbly taken photo.

Wednesday, September 12, 2007

A Welcome Visitor.

We had a very welcome visitor yesterday. Yes you will recognise him if you read his blog Granny Buttons. Andrew Denny stopped off in Stone and was moored just up the canal from our boat. Having walked past his boat with Paddy early in the morning, I went back to and see him on Granny Buttons, Andrew then came to the boatyard armed with his camera, to come and have a look at Hadar. It was wonderful to finally shake the hand of Andrew and put a face to the wonderful blog diary he writes. Andrew was very taken with Paddy as was Paddy with him. Keith and I had a lovely time chatting to Andrew. If you see Granny Buttons and Andrew whilst out and about say hello to him, he is a lovely guy. We look forward to catching up with him again when we are on the move.

Today we got the opportunity to take some photographs of Hadar.

Viewed from the Basin.

Today Keith took advantage whilst we had to move Hadar out of the basin, so that a boat could be craned back into the water, to take some photos of Hadar moored on the towpath.

Bow View.

As you can guess we are very proud of her. Trust Paddy to get in on the act. He loves to lay on the counter.

Stern View.

Saturday, September 08, 2007

Loading 5 Tons of Coal by Hand

The 1st Bag.

Yesterday saw the arrival of our 1st consignment of coal. It arrived by lorry early in the morning. The plan was to unload it from the lorry into wagons on Roger's narrow-gauge railway. We had previously the day before sorted out 3 wagons, 2 of which could carry 1ton each and the 3rd would hold ½ton. Thus with 2 train loads we could move the full 5tons. The delivery man handed us down the bags and Keith and I stacked them in the wagons. I had the honour of taking the 1st bag, seeing as the business is in my name.

2½tons Loaded and Traveling by Train to the Wharf.

With all 3 wagons filled, the 1st 2½tons was then transported by the train around to the wharf. We then had to unload the wagons at the wharf so that the train could return to the car park for the final load. The whole lot was unloaded and paid for within 45 minutes!

Already to be Loaded into the Hold.

Keith and I then had the task of loading it all into Hadar's hold. Piled up high it looked a daunting task, but we set about it a ton at a time with a drinks break in between to keep our fluid levels up, especially as the sun had come out.


The 1st Sack Goes In.

We used a slide to assist getting the sacks in for the lower layers, until they were high enough to be able to lift the higher ones in directly onto the lower ones. As each ton went in we also checked the level of the boat. The bow was coming done and the stern was staying the same, which was great news. With the final sack in place the sheeting was refitted, Job Done! and amazingly in one day, we had expected to take the weekend to get it loaded in. We went out for a meal to celebrate. Rather surprisingly this morning we both woke up expecting to ache all over, but we didn't!

Filling Up Nicely.

Many thanks to Tina and Roger for taking the photographs for us, so that we could put them in to the diary. Another dream come true for Keith, to see his working boat carrying cargo.

All 5 tons Onboard.

Monday, September 03, 2007

Sheet Stencilling

Working Out the Stencil Postions.

This past week saw the stencilling of the sheeting. First of all the stencil was offered up to the sheets whilst still fitted to the boat to mark the locations on each sheet. This would ensure that the final stencils would be straight, centred and the same on both sides of the boat.

Stencilling the 1st Half of 1st Sheet.


Then the 1st sheet was removed and taken into the unit. Here it was laid out on the floor and the stencil attached in the correct location. Then the stencil was rollered by Tina with Roger hold everything in place. Great care had to be taken as the paint used is specially designed to actually melt into the plastic sheeting. It has a tendancy to go stringy, especially if there is any wind or breeze, so all doors had to be kept shut. It also is very unforgiving if accidentally applied to the wrong place, it won't come off!


The Completed Stencilling of the 1st Half of 1st Sheet.

It dries very quickly.

Stencilling the 2nd Half of 1st Sheet.

The stencil is then moved to the other half of the sheet and the process is repeated.

The Completed Stencilling of 1st Sheet.


The final result is amazing. Tina did a fantastic job. The stencil joints on the O and D have to brush painted over, unlike a lot of sheet stencilling, the GUCCCo filled in the lettering. Once the sheet had fully dried it was refitted and the same process was repeated for the 2nd and 3rd sheets. The 2nd sheet was refitted but the 3rd was left in the unit as it was too dark to fit it safely. It was fitted the following morning. Fortunately it wasn't supposed to rain overnight!


Refitting the 1st Sheet.

The Completed Sheet Stencilling.

Friday morning the final completed sheet was refitted. This now completes the outside work on Hadar, and very smart she looks too, thanks to Tina who has worked her magic. Roger has progressed well with the work inside and has whittled our "To Do" list down to the last 2 items. 2 of the major jobs done were the fitting of the floor in the hold and fitting the thermostat in the generator cooling circuit to allow the calorifier to heat up 1st before going to the skin tank. Keith managed on Thursday to cure the problem with the washing machine not working with the generator. He checked the frequency of the generator output and it was set to 60Hz, the American frequency, ooops! Keith readjusted the speed of the generator and set it to give 50Hz. I ran the washing machine and success, it worked properly. So another week over and we are getting ever closer to setting off.