


This was the original layout from inside the box, which in this photo I have already sawn the board up and removed the curved track.

This photo is with the sections repositioned to form the new layout.

The layout has had a wood edging added to it and placed in it’s position on the shelf above the display cabinet with my ‘0’ gauge rolling stock in it.

The new section of track has been added to reconnect the original two halves.

Viewed from the end of the layout.

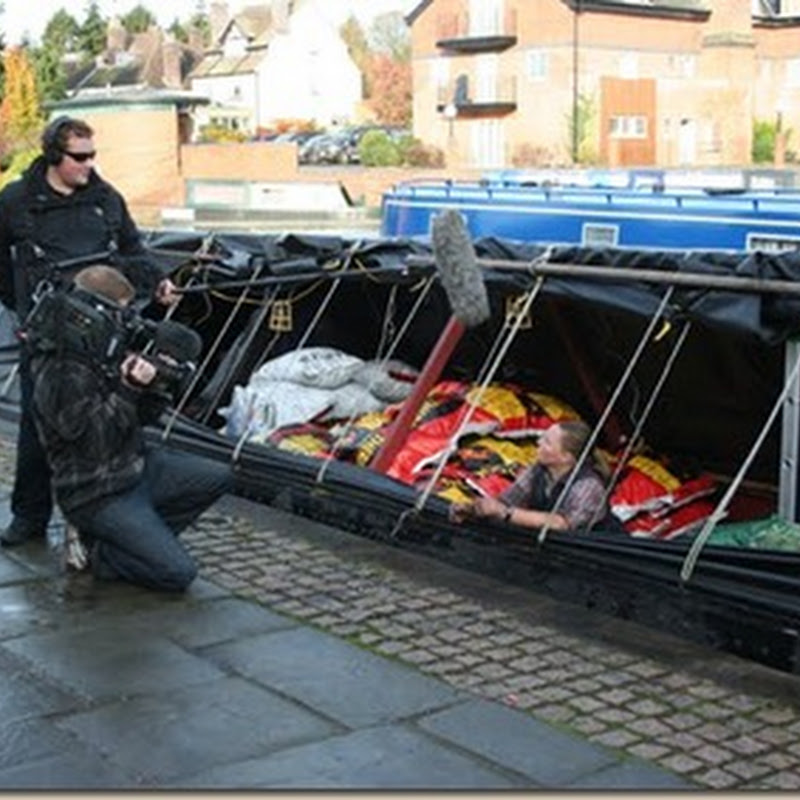
Electrically testing the layout with some of the existing stock having wired up the layout. The existing stock is what I kept from my late father’s layout.

Starting construction of the road bridge over the railway to divide the layout to the right, from the “fiddleyard” to the left. A “fiddleyard” is a model railway term for the rest of the railway, which is where rolling stock can be changed.

Ballasting the new section of track.

The road bridge is completed.

The baseboard and landscaping has been painted with “chocolate” emulsion paint.

Ballasting completed.

Attaching the 3 buildings and fences. the smallest building came ready made and painted, the other 2 were kits which had to be built and painted.

Trees positioned and fixed in place.

Rock face and bushes fixed in place at the end of the layout, appropriately shaped so I can still see all of the TV from my armchair!

Level crossing made from balsa wood and painted.

Scatter and foliage added. Scatter is very small material that is appropriately coloured to represent, grass, meadowland, etc..

PVA glue applied to the baseboard before sprinkling the scatter on the front of the layout on what will be a sheep field.

Applying the PVA glue at the rear of the layout behind the fencing.

The rear of the rock face has been finished off with balsa wood, and subsequently varnished, to hide the rough rear to the ‘cork’ that I used for the rock face, and the wood construction to attach it to the baseboard.

Sprinkling ‘scatter’ on using a teaspoon!

Different coloured scatter used in the station and mine area, the darker grey scatter represents the tarmac roadway. The lighter grey has just been applied and awaiting drying before removing the loose scatter.


Station and mine area scatter completed and the station platform constructed from balsa wood fixed in place
 The high level line which emerges from the mine again constructed from balsa wood with tipper wagons on the mine track, which tip the material mined into the larger wagons below.
Level crossing barriers and loading gauge fitted. A loading gauge is to check that wagons are not loaded too high to clear bridges etc..

The high level line platform completed with safety barriers and access ladders, and the mine entrance constructed and all painted.


3 stages of adding ‘spilled’ mining material on and around the high level line. Stage 1: selecting a piece with a pair of tweezers. Stage 2: applying PVA glue to the selected piece. Stage 3: positioning the piece in place.

Mine workers fixed to the layout.
I then painted some wild animals and placed them in various locations around the layout.

A Badger.

A Hedgehog.

A pair of Squirrels.

A Hare running beside the track.

4 Rabbits.

Finally a Weasel scurries alongside the road.


A farmer with his tractor and trailer about to collect some sheep.

A Landrover crossing the road bridge. I made the ‘Hump-Backed Bridge’ sign by printing out the image on our printer and sticking it to a needle painted grey.

This model of a Baldwin 2-6-0 loco I originally built for my late father for his layout. I have repaired and repainted it and got it running quite nicely now, hope Dad likes to look down on it.
And finally station station staff and passengers were added to the layout, which has completed it.


The finished layout.

Since taking the last photo I bought some new carriages and they fouled on the fencing between the track and the footpath from the road to the platform. I therefore had to remove that piece of fencing. Also I must check the height of any future level crossings, as the steamcoach I have fouls on the one I built! I am not too bothered about this as I have enough passenger coaches for this layout.
Now I can sit back and enjoy it. In the meantime, Jo has suggested that when we stop selling coal, I should build a larger layout in the hold, which I have already started making plans for. Watch this space for when I start that project.
Keith.

3 comments:
Just been catching up with your blog, Keith. Your model railway construction is amazing! Incredible attention to detail - it must have taken very many hours. Great "start-to-finish" description with pictures. May your hold layout go well - I look forward to seeing it when it's finished!
Hello Halfie, in terms of model railway building I don't think it took all that long, I started it 22nd November 2015, so approximately 3 months, and taking into account that funds were limited, and although it is sited on top of my display cabinet, most of the work was carried out in the galley, in between meals. It certainly didn't take as long as my 'O' gauge layout which took years to build. Many modellers say that a model railway is never finished, but that does not apply to me. I do get great enjoyment from building, but I get just as much pleasure from running it. The new layout in the hold will take a lot longer, apart from finance, I will have to build a 'room' under the sheeting, which will begin from the saloon bulkhead, and extend for 17ft to the mast, with a wall and door at the mast end, the door to allow access into the hold forward of the mast. I will only have the 12ft section between the mast and the stand for the layout, the 5ft section from the saloon to the stand will be used for storing general stuff, which is what it is used for at the moment, but the whole 17ft will need walling to be able to have an operable temperature in there during the winter using the heat from the saloon coal stove.
What I should have also added was that I want to purchase all the timber for the room and layout and have it all delivered at the same time to save on delivery costs.
Post a Comment